Features
This page provides an overview of the main features of the plugin, with detailed explanations and screenshots for each tool.
Vertex Color
This feature allows you to quickly manage vertex colors on selected objects. The interface provides several buttons to apply specific color presets (such as Rock, Dirt, Mountain, Wall, etc.) or to remove vertex colors from all selected objects.
By default, the colors used are the same as those from the terrain shader, ensuring compatibility and consistency with the terrain material.
When applying vertex colors, the plugin creates a color attribute named Color 2 on the selected objects.
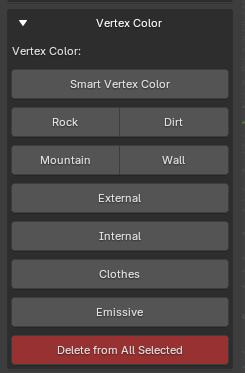
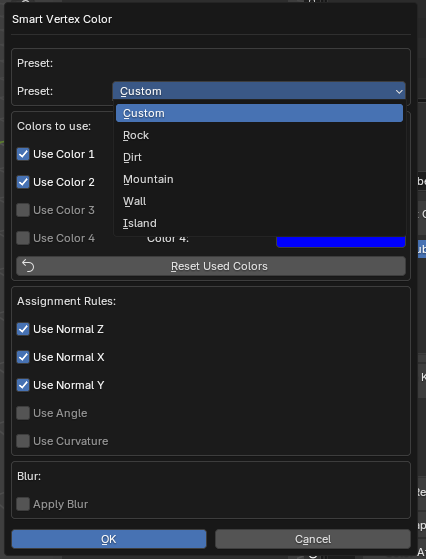
Smart Vertex Color
Clicking on “Smart Vertex Color” opens an advanced window where you can:
- Choose a color preset (Custom, Rock, Dirt, Mountain, Wall, Island)
- Select which colors to use
- Define assignment rules based on normals (Normal X, Y, Z), angle, or curvature
- Apply a blur effect
This function automates the assignment of vertex colors based on geometric criteria, making it easier to color complex meshes.
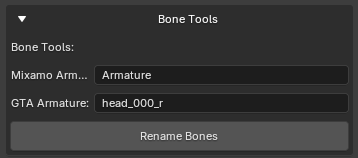
Bone Tools
The Bone Tools feature allows you to easily rename bones in an armature to match different naming conventions, such as those used by Mixamo and GTA.
- Mixamo Armature: Enter the name of the source armature (typically from Mixamo).
- GTA Armature: Enter the target bone name format (for example,
head_000_rfor GTA rigs). - Click Rename Bones to automatically rename all bones in the selected armature according to the specified convention.
This tool streamlines the process of retargeting animations or preparing models for different platforms by ensuring bone names are compatible.
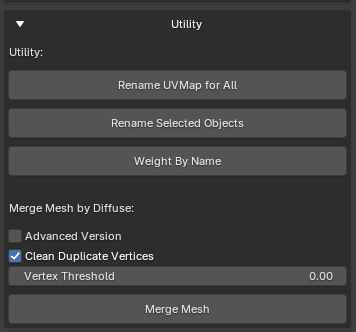
Utility
The Utility panel provides several helpful tools for managing and optimizing your 3D models:
- Rename UVMap for All: Renames the UV map for all selected objects to UVMap 0, which is the default UV map name used in GTA.
- Rename Selected Objects: Quickly renames all selected objects in the scene.
- Weight By Name: Assigns weights to bones or vertex groups based on their names, streamlining the rigging process.
Merge Mesh by Diffuse
This section allows you to merge multiple meshes based on their diffuse color:
- Advanced Version: Enables advanced merging options (when checked).
- Clean Duplicate Vertices: Removes duplicate vertices during the merge process for a cleaner mesh.
- Vertex Threshold: Sets the distance threshold for considering vertices as duplicates (useful for fine-tuning the merge).
Click Merge Mesh to combine the selected meshes according to the chosen settings.
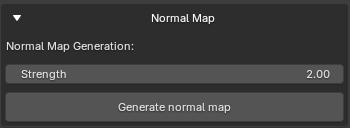
Normal Map
The Normal Map panel allows you to generate a normal map for your selected mesh directly within the plugin.
- Strength: Adjusts the intensity of the generated normal map. Higher values will produce a more pronounced effect.
- Click Generate normal map to create and apply the normal map to your mesh.
This tool simplifies the process of adding surface detail and enhancing the appearance of your models by generating normal maps with customizable strength.
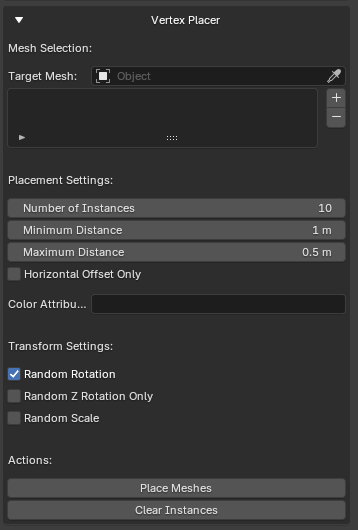
Vertex Placer
The Vertex Placer tool allows you to efficiently scatter and place multiple instances of a mesh on the surface of a target object, with customizable placement and transformation settings.
A temporary color attribute must be created for placement. Instances will not be placed on areas where the color is black.
Mesh Selection
- Target Mesh: Select the mesh object on which the instances will be placed.
Placement Settings
- Number of Instances: Set how many instances to place.
- Minimum Distance: Minimum allowed distance between placed instances.
- Maximum Distance: Maximum allowed distance between placed instances.
- Horizontal Offset Only: When enabled, restricts placement to horizontal offsets only.
- Color Attribute: Optionally specify a color attribute to influence placement.
Transform Settings
- Random Rotation: Apply random rotation to each instance.
- Random Z Rotation Only: Restrict random rotation to the Z axis.
- Random Scale: Apply random scaling to each instance.
Actions
- Place Meshes: Place the instances on the target mesh according to the settings.
- Clear Instances: Remove all placed instances.
This tool is ideal for quickly populating environments with objects such as rocks, plants, or props, ensuring natural distribution and variation.